Materials:
- 2 High Intensity Infrared LEDs (@$2.39 each)
- 1 4 AAA Battery Pack with on/off switch ($2.99)
- 1 47-ohm resistor (a pack of 5 for $0.99)
- a couple feet of insulated wire (a spool of 50 feet for $5)
The Wii sensor bar is simply two groupings of powered infrared LEDs which the Wii remote uses to triangulate its position relative to the screen; as such, a homemade sensor bar will also have two groupings of LEDs. I went ultra cheap and only used 2 LEDs, but it is possible to have more, the Nintendo Wii sensor bar uses 5 on each side, for a total of 10. The reason for this design is to create a bigger LED source for the Wii remote to detect. From my experimentation, the Wii remote seems to use ANY two LED sources to use to triangulate, meaning that if you space the LEDs too far apart, the control feedback of the Wii will not be smooth, because it will attempt to triangulate using the two LED points.
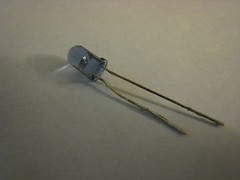
Other notes: IR LEDs can be viewed using a digital camera with a live view screen, and make sure they are wired correctly (on my LEDs, the long end is the positive end, the short end is the ground).

The sensor bar I built is a little bigger than the Nintendo supplied one, and actually looks quite slapped together (it's mounted on a cardboard box lid at the moment). I'll make a more polished sensor bar later, but for now, this works fine.
How to build the bar is actually pretty simple; from the power source, attach the resistor, and then run the LEDs in a series, and then complete the circuit by attaching the ground.


Leave a comment